Using the Editor
Learn how to use the Hypermod Sandbox editor to build and deploy code migrations across multiple repositories.
Welcome to the Hypermod Sandbox guide. This guide will help you understand the features and functionalities of Hypermod, a tool designed to build and deploy powerful code migrations across multiple repositories simultaneously. This is particularly useful for developers managing a large amount of code and struggling with dependency management and technical debt.
Overview of Hypermod
Hypermod allows developers to:
- Build and deploy code migrations across multiple repositories.
- Manage dependencies and technical debt efficiently.
One of the core features of Hypermod is the Sandbox, which we'll explore in detail.
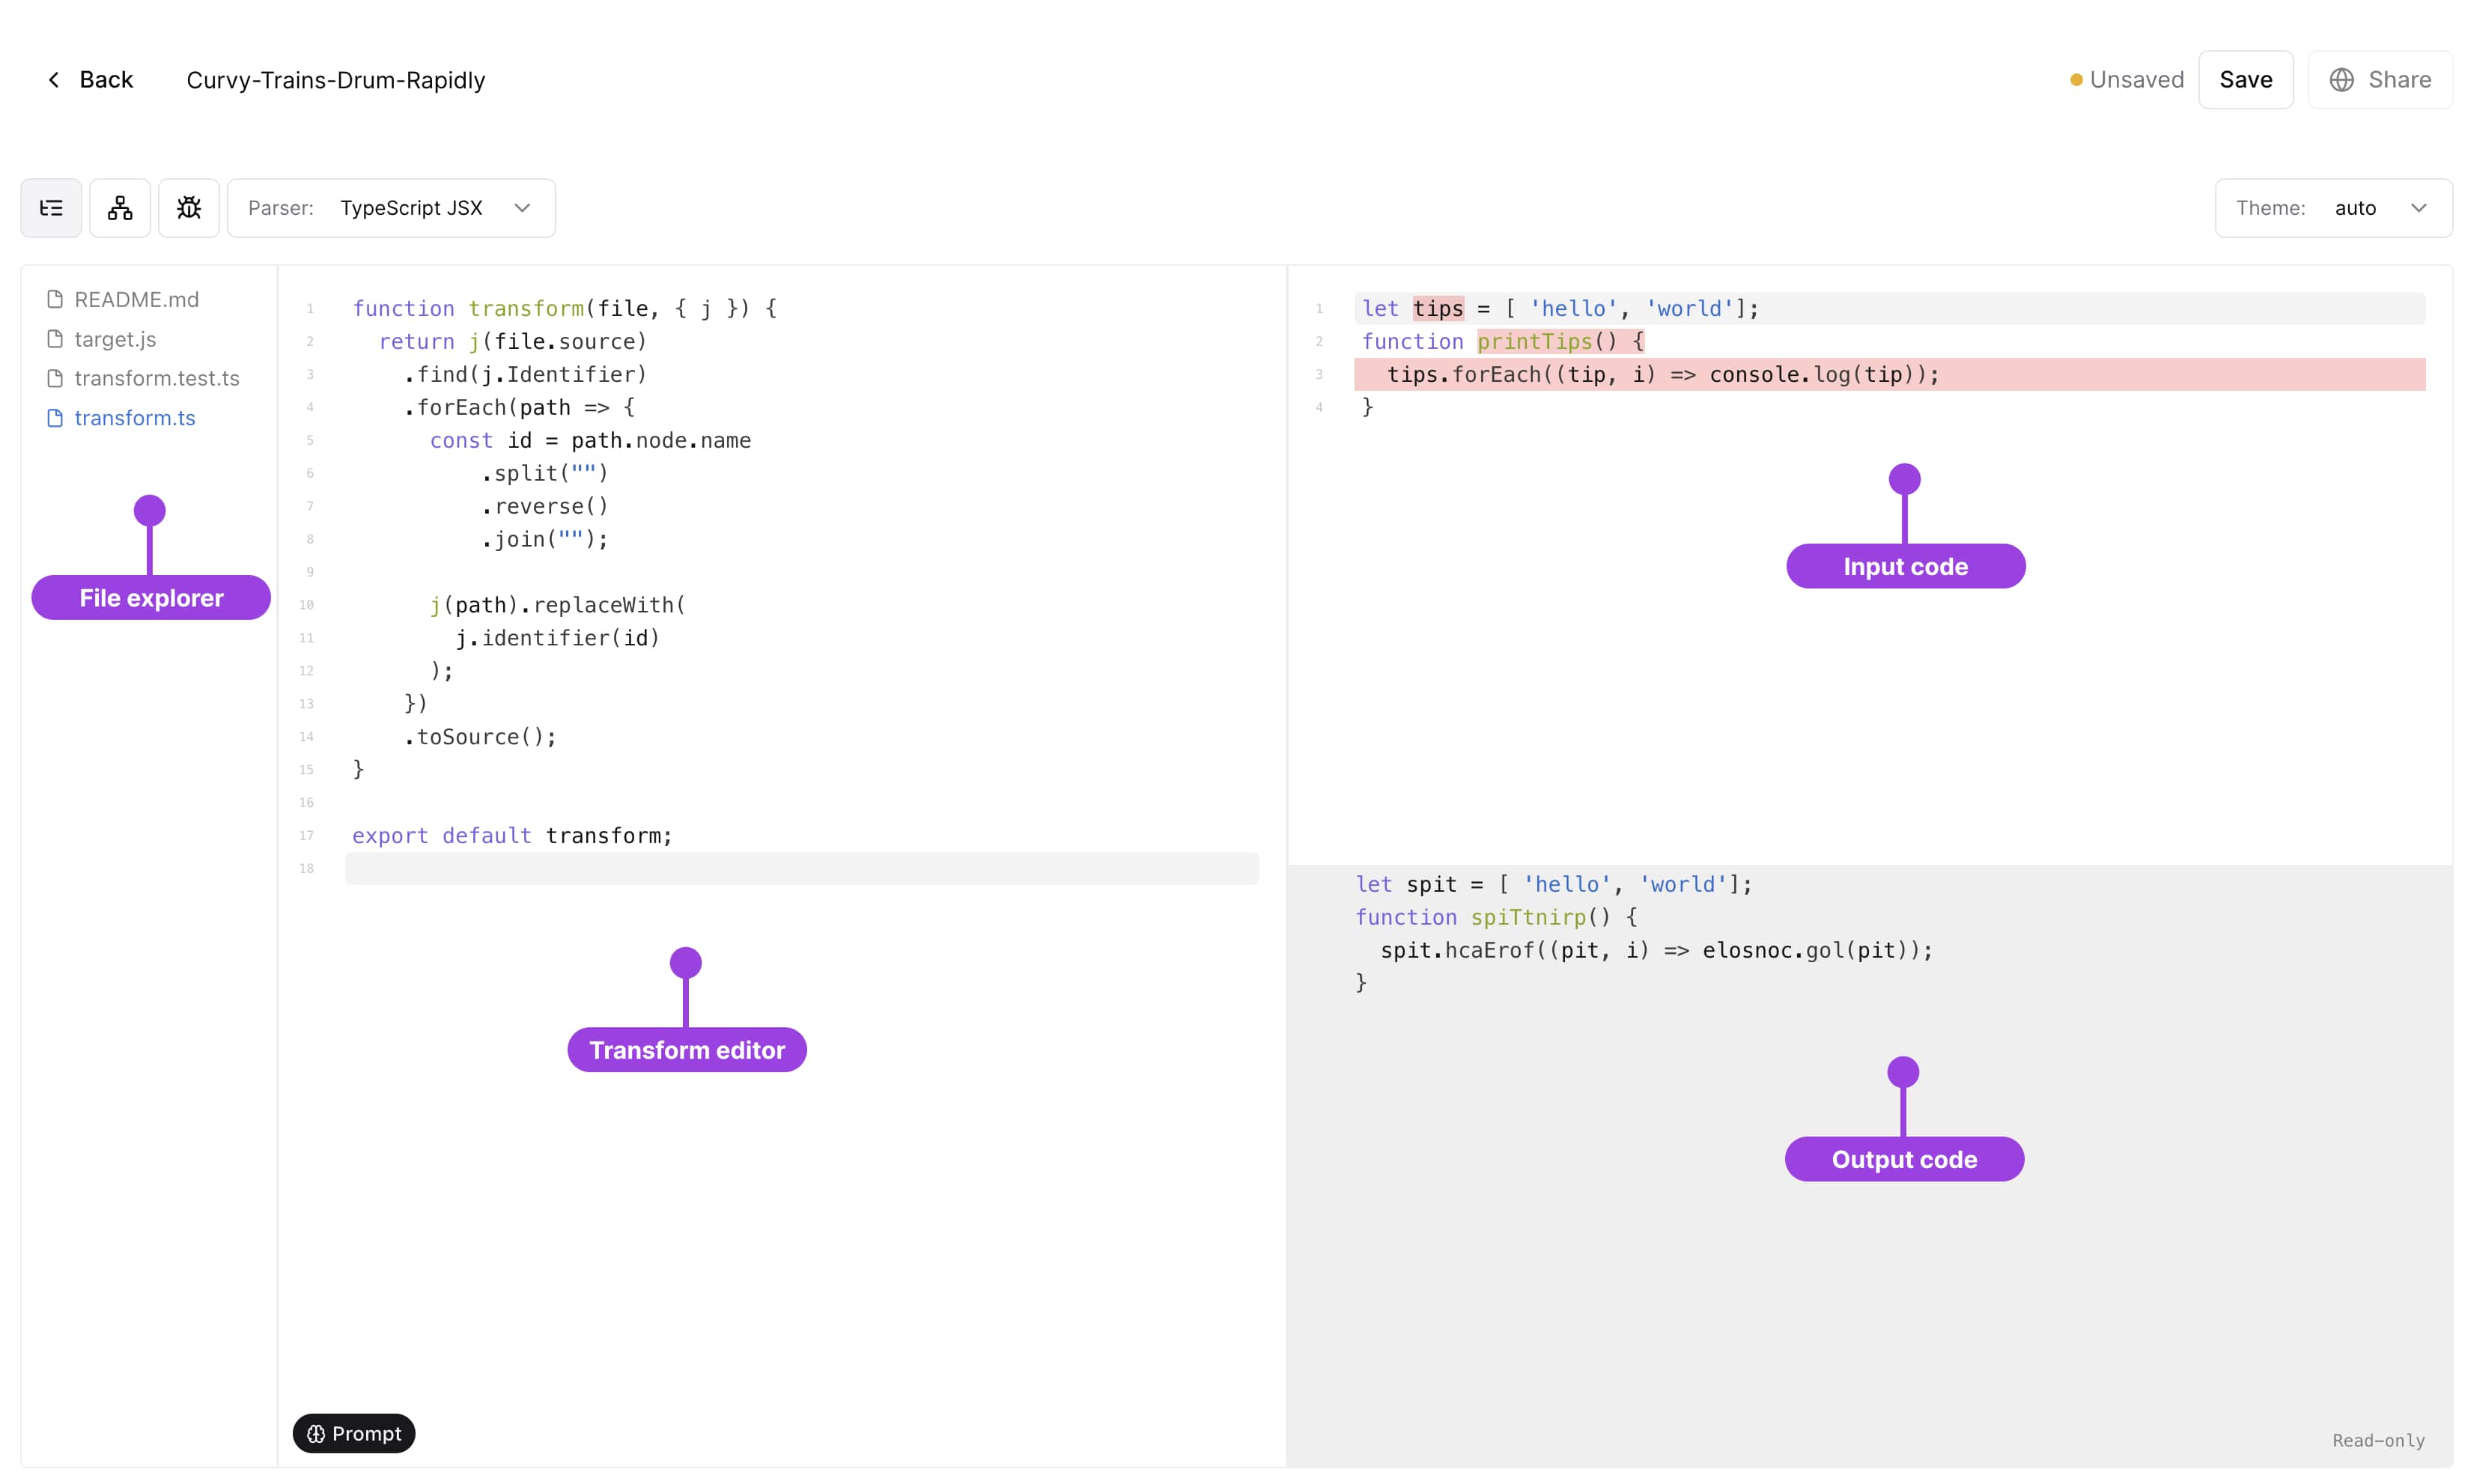
The Sandbox
The Sandbox in Hypermod is a powerful environment where you can design, test, and deploy code modifications. It has several key panels similar to what you might expect from an editor like VS Code.
Key Panels in the Sandbox
-
Codemod Panel:
- The area where you write and test your code modifications.
- Default codemod tool used is
JSCodeShift.
-
Target File Panel:
- Displays the file that you want to transform.
-
Output Panel:
- Shows the result after the codemod has been run.
-
File Tree:
- Contains the structure of your codemod project.
- Includes a
README, a target file, a test file, and the transformation file itself.
-
AST Explorer:
- Displays the abstract syntax tree (AST) of your code.
- Helps you understand the structure of your code, making it easier to modify.
Top panel
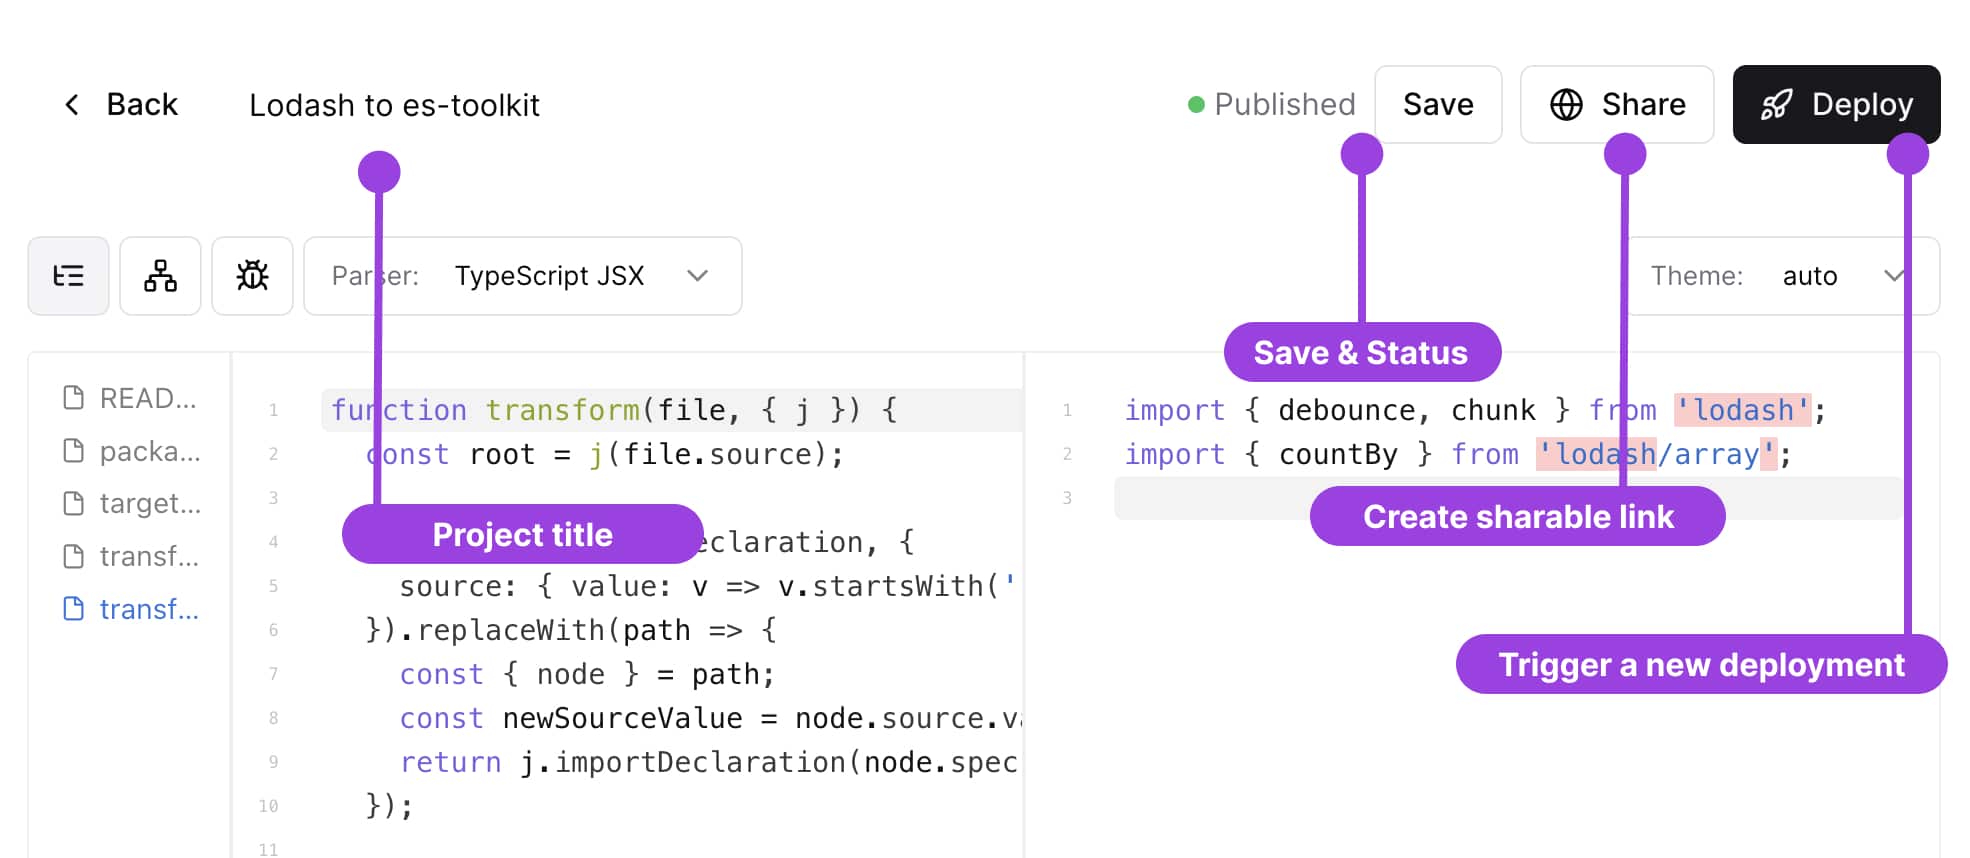
The top panel contains the following elements:
-
Project Title:
- The name of your codemod project.
-
Save Button + Current saved status:
- Allows you to save your codemod project.
- The save status is displayed as a green checkmark when the project is saved.
-
Share dropdown:
- Allows you to produce a shareable link, which can be used to share your codemod project with others.
-
Deployment Button:
- Navigates you to the deployment page where you can deploy your codemod project.
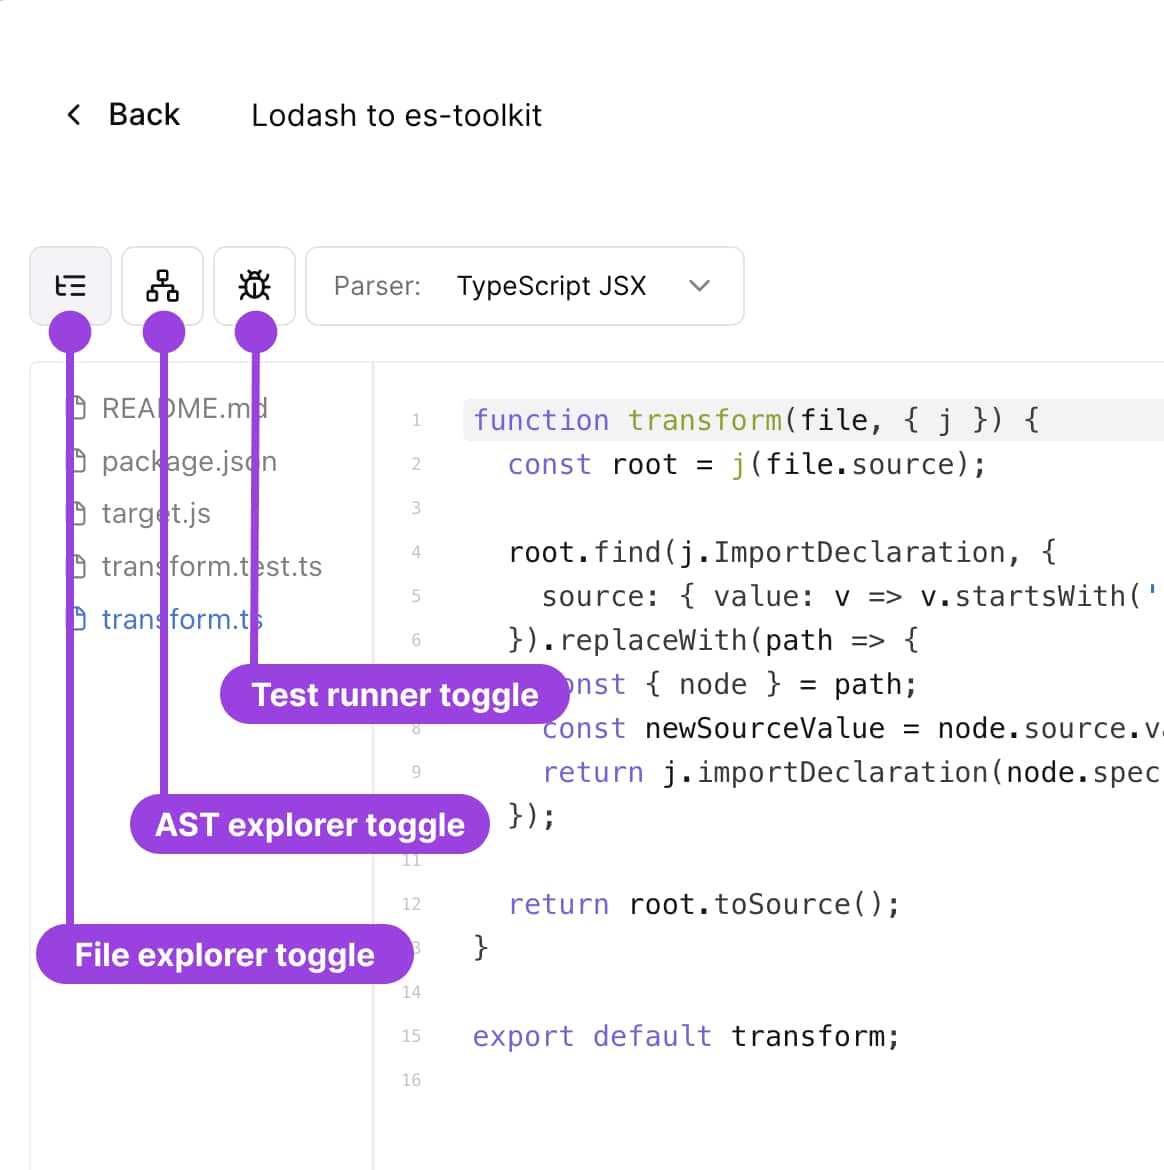
Toolbar
The toolbar contains various options to help you manage and test your codemod project:
-
File Tree Toggle:
- Allows you to hide or show the file tree panel.
-
AST Toggle:
- Enables or disables the AST explorer panel.
- Useful for understanding the structure of your code.
-
Test Toggle:
- Toggles the test panel.
- Allows you to write and run unit tests for your codemod.
Prompt mode
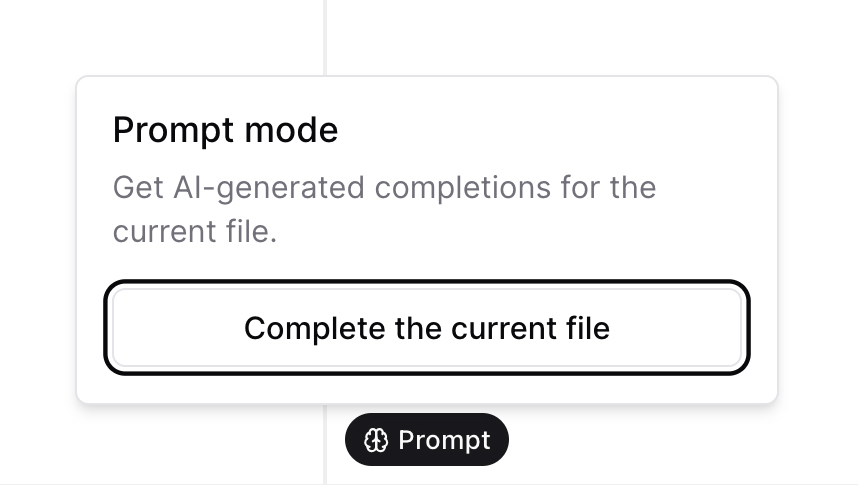
Prompt Mode is a feature that helps you write codemods more efficiently by using generative AI (Open AI 4o) to suggest code snippets based, using context you provide in your project (README, target file, etc.) to generate suggestions.
Writing a Codemod
Example Scenario
In this example, we will move from using the old lodash module to the newer tree-shakable version, e.g. the lodash/debounce import scheme.
-
Populate the README:
- Start by writing an example in the
READMEfile. - Provide a before and after example of the code.
- Example: Migrating from the old
lodashto the newlodash/[entry-point]import scheme.
- Start by writing an example in the
-
Edit the Transform File:
- Add code to the transform file to perform the migration.
- You can use the
AI Prompt Modeto help fill in the gaps by leveraging the information in yourREADME.
-
Review the Output:
- The sandbox will generate output based on your codemod.
- Check for any issues.
-
Save the Codemod:
- Once satisfied, name and save your codemod project.
Testing the Codemod
Now that you've written your codemod, it's time to test it.
-
Repo Preview:
- Use the repo preview feature to test your codemod against actual repositories.
- Example: Testing the
lodashmigration on a connected test repository.
-
Review Changes:
- Verify that the old imports have been successfully replaced with the new imports.
Conclusion
You've now successfully navigated the basics of the Hypermod Sandbox. For further exploration, visit the sandbox at hypermod.io/sandbox.
Note that some features might require login access.
Thanks for following along, and happy coding!